|
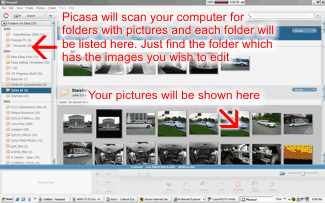
Tutorial: Cropping Your Pictures Sometimes the pictures you want to post in your gallery or use as images for your online store need to be cropped. This tutorial will discuss how to crop your pictures using the powerful free Google image software Picasa. First download Picasa directly from our server by clicking here. You can also obtain Picasa directly from Google's servers by clicking here. Once you have downloaded and installed the program you can proceed by running the software. Picasa will automatically scan your entire hard-drive for picture files and display them in an easy to use layout. The folders on your hard-drive that contain pictures will be displayed along the right side and then the pictures will be in the main window of the program.
Select the folder that has the files you wish to crop. If you can't
see your folder click on 'File' in the menu bar and select 'Add
Folder to Picasa'.
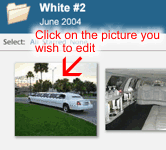
You will then see all the pictures in that folder in the main
window. Double-click the image you wish to crop.
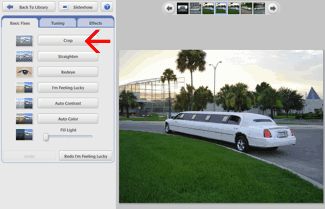
Next, click on the 'Crop' button to begin cropping the picture.
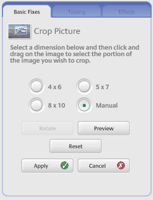
The 'Crop Picture' frame will come up and you can just leave the
cropping method set to manual. This will allow you to highlight the
exact portion of the picture you want to crop out.
Click and drag the mouse to highlight the part of the picture that
you want to crop it down to.
Then click the 'Back to Library' button (above the information
frame) to go back to the main screen. The picture you just edited
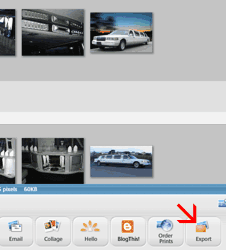
will be in the Picture tray (bottom left part of the screen) so just
click the 'Export' button (bottom right part of screen) to save your
changes to a new image file.
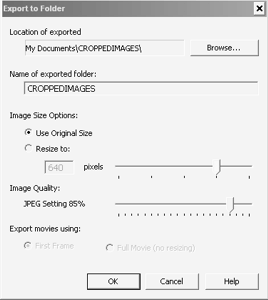
In the 'Export to Folder' dialog box choose the folder you want your
newly cropped files to be saved in. If your image is large you can
also resize it for faster loading. We recommend a maximum-sized
image of 640x480 for normal web use. If your image is already a good
size then just choose 'Use Original Size'.
Click 'Ok' to complete the process and save your cropped file to the folder
your specified.
And that's it! You are ready to use your newly cropped picture.
CROPPING CATALOG IMAGES FOR YOUR ONLINE STORE
The same process outlined above can be used to crop your scanned
catalog pages. Just select your scanned catalog image and crop the
pictures for each of your items as outlined above. Then just add
your new products via your online store's control panel and use your
newly cropped images.
|
|
|
Toll-free: 877-467-6932 • Online: Contact Us
Home | Webdesign & Hosting | Register Your Domain | Portfolio • Privacy Policy | User Agreement | Terms of Use | Copyright Information


